目次 [非表示]
- 屋根修理・リフォームの専門業者であること
- 国家資格の建築士が現地調査を行うこと
- 施工実績が1,200件と圧倒的に豊富なこと
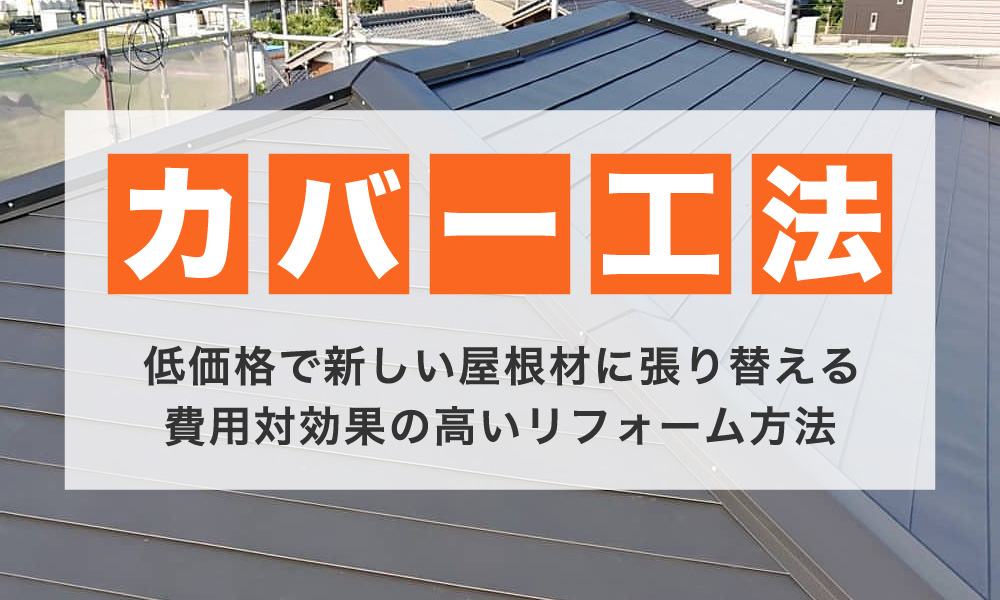
カバー工法による屋根のリフォームを提案した経緯
現地調査を伺い屋根の劣化状況を踏まえてカバー工法(重ね葺き)による屋根のリフォームをご提案させて頂きました。 カバー工法を提案させて頂いた具体的な理由は下記の3点です。- 屋根材が塗装の下地として使用できないため
- ガルバリウム鋼板に葺き替える最適なタイミングであること
- 低価格で費用対効果の高い屋根リフォームを実現できること
ビフォーアフター
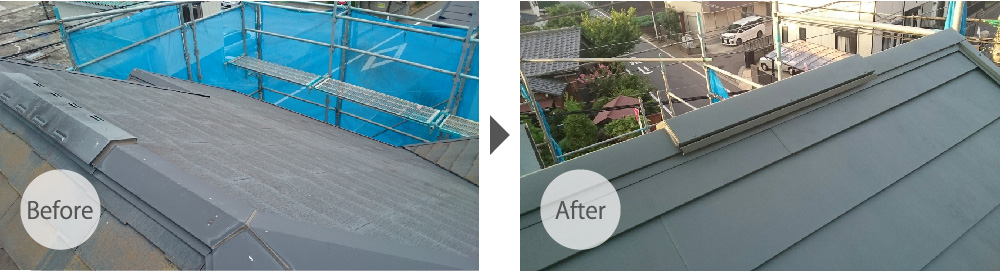
 築年数が25年が経過しており屋根材の表面にカビ生えている状態でした。スレート瓦の耐用年数は25年〜30年であり屋根材を新しくするには最適なタイミングでした。
ガルバリウム鋼板と呼ばれる金属製の屋根材を使用しましたが、ガルバリウム鋼板は塗装メンテナンスの必要が無いメンテナンスフリーの屋根材で、将来的なメンテナンスの費用を節約することができます。
また、耐用年数も35年〜40年と非常に長期的でガルバリウム鋼板の屋根にすることで、費用対効果の高い屋リフォームを実現することができます。
スレート屋根からガルバリウム鋼板に葺き替えることで、将来的なメンテナンスの手間と費用を節約できる費用対効果の高い屋根リフォームを実現することができます。
築年数が25年が経過しており屋根材の表面にカビ生えている状態でした。スレート瓦の耐用年数は25年〜30年であり屋根材を新しくするには最適なタイミングでした。
ガルバリウム鋼板と呼ばれる金属製の屋根材を使用しましたが、ガルバリウム鋼板は塗装メンテナンスの必要が無いメンテナンスフリーの屋根材で、将来的なメンテナンスの費用を節約することができます。
また、耐用年数も35年〜40年と非常に長期的でガルバリウム鋼板の屋根にすることで、費用対効果の高い屋リフォームを実現することができます。
スレート屋根からガルバリウム鋼板に葺き替えることで、将来的なメンテナンスの手間と費用を節約できる費用対効果の高い屋根リフォームを実現することができます。
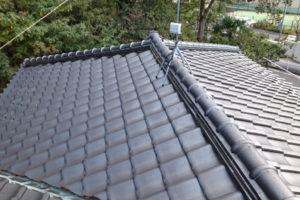
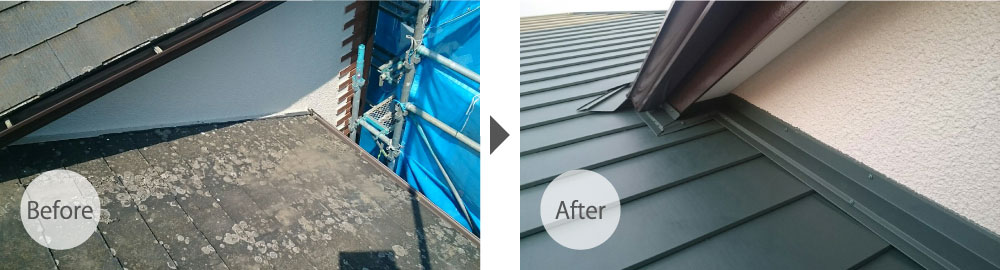
 屋根の頂点には棟板金と呼ばれる金属製のカバーがありますが、棟板金も一部、サビが発生しておりメンテナンスが必要な状態でした。
こちらの屋根は棟換気がありましたが、こちらもサビが発生しており交換が必要な状態でした。
スレート屋根の棟板金はトタン(亜鉛メッキ鋼板)が使用されたており、屋根塗装によるメンテナンスが必要ですが、メンテナンスフリーのガルバリウム鋼板に交換することでメンテナンスの手間が発生せずに、将来的な費用を節約することができます。
屋根の頂点には棟板金と呼ばれる金属製のカバーがありますが、棟板金も一部、サビが発生しておりメンテナンスが必要な状態でした。
こちらの屋根は棟換気がありましたが、こちらもサビが発生しており交換が必要な状態でした。
スレート屋根の棟板金はトタン(亜鉛メッキ鋼板)が使用されたており、屋根塗装によるメンテナンスが必要ですが、メンテナンスフリーのガルバリウム鋼板に交換することでメンテナンスの手間が発生せずに、将来的な費用を節約することができます。
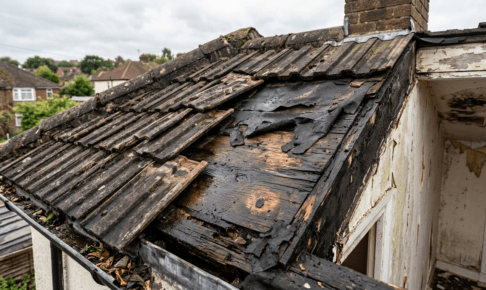
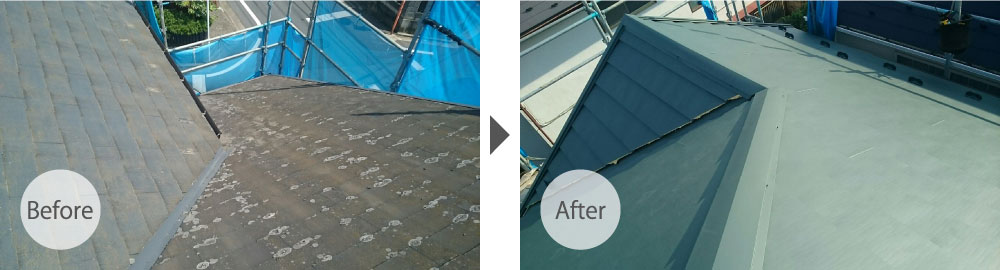 経年劣化によって屋根材の表面にカビとコケが発生してる状態でした。また、屋根材の機材(本体)も一部欠けている箇所がありました。この状態で屋根塗装を行っても塗料本来の耐用年数(寿命)を発揮することができずに、「塗装後、すぐに塗料が剥がれた」などの施工不良の原因にもなります。
カバー工法によりガルバリウム鋼板に葺き替えることで施工不良による不具合の危険を回避して、今後、30年以上快適に住み続けられるガルバリウム鋼板によるカバー工法を提案させていただきました。
経年劣化によって屋根材の表面にカビとコケが発生してる状態でした。また、屋根材の機材(本体)も一部欠けている箇所がありました。この状態で屋根塗装を行っても塗料本来の耐用年数(寿命)を発揮することができずに、「塗装後、すぐに塗料が剥がれた」などの施工不良の原因にもなります。
カバー工法によりガルバリウム鋼板に葺き替えることで施工不良による不具合の危険を回避して、今後、30年以上快適に住み続けられるガルバリウム鋼板によるカバー工法を提案させていただきました。
屋根カバー工法リフォーム施工前の様子
リフォームの前の屋根の劣化症状を見て行きましょう。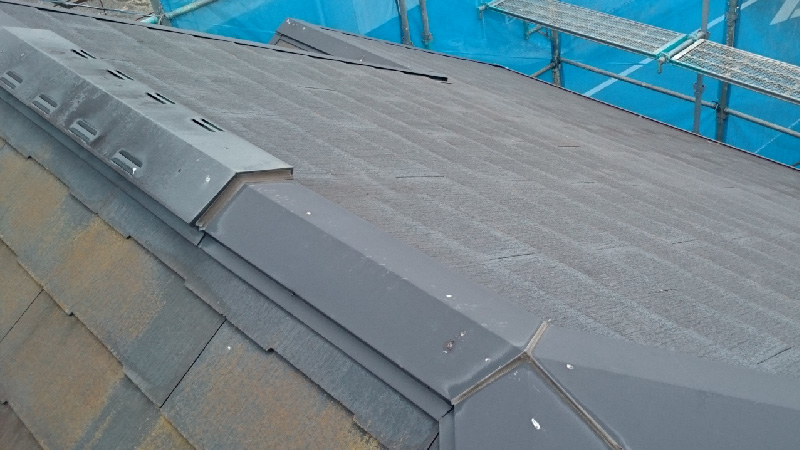 屋根の頂点にある棟板金の様子です。塗装の劣化症状であるチョーキング現象が発生していました。この状態のまま劣化症状を放置すると、錆が発生して穴が空いてしまい雨漏りの危険があるので修理が必要な状態でした。
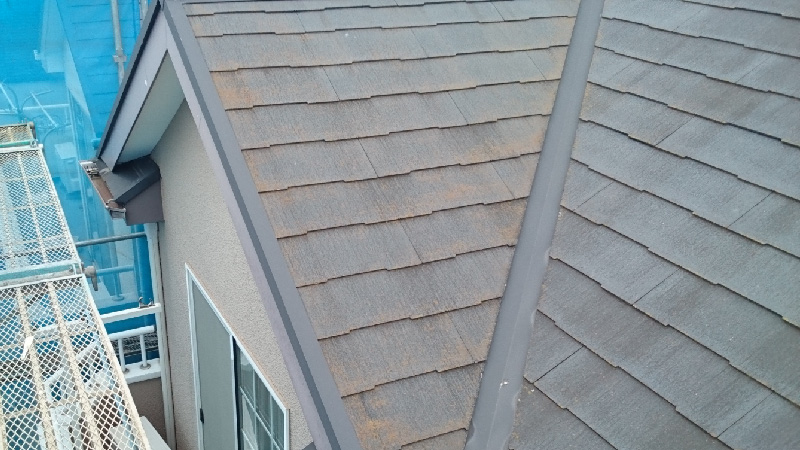
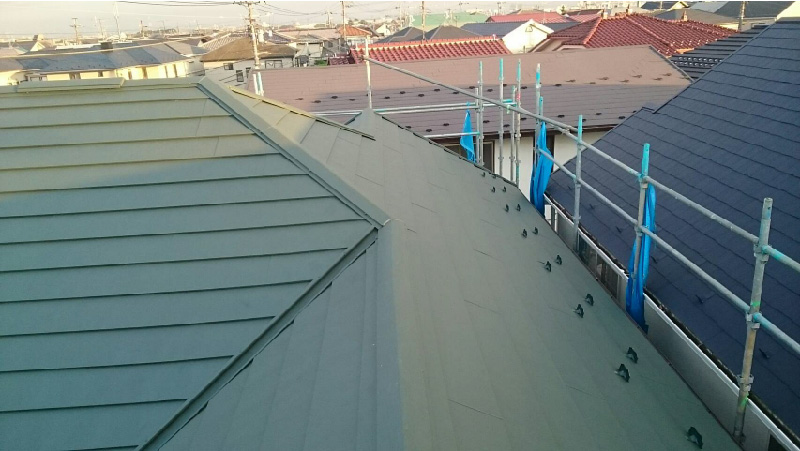
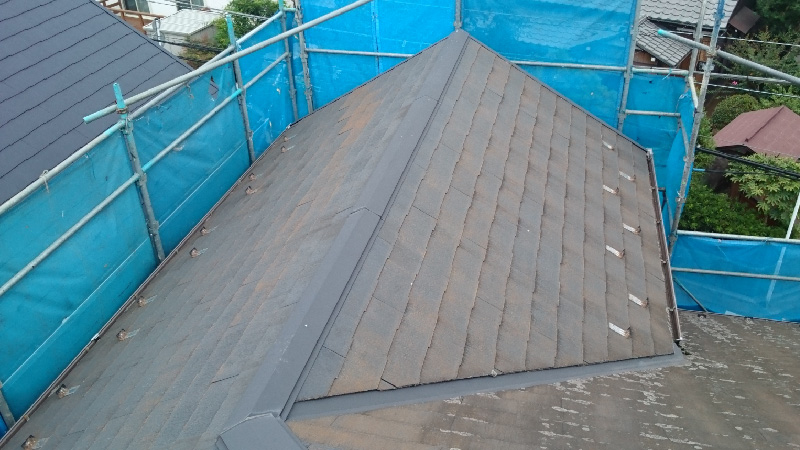 屋根全体の様子です。屋根材の表面にカビやコケが生えています。これはスレート屋根では必ず発生する劣化症状ですが、屋根材が水分を吸収している証拠で、屋根材の基材(本体)そのものが劣化している状態です。
この状態で屋根塗装を行っても「塗装後、すぐに塗料が剥がれる」などの施工不良が発生する危険が高いために、カバー工法による重ね葺きリフォームが最適です。
屋根全体の様子です。屋根材の表面にカビやコケが生えています。これはスレート屋根では必ず発生する劣化症状ですが、屋根材が水分を吸収している証拠で、屋根材の基材(本体)そのものが劣化している状態です。
この状態で屋根塗装を行っても「塗装後、すぐに塗料が剥がれる」などの施工不良が発生する危険が高いために、カバー工法による重ね葺きリフォームが最適です。
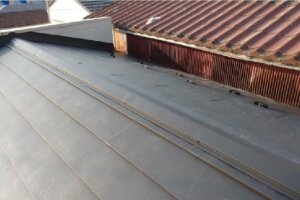
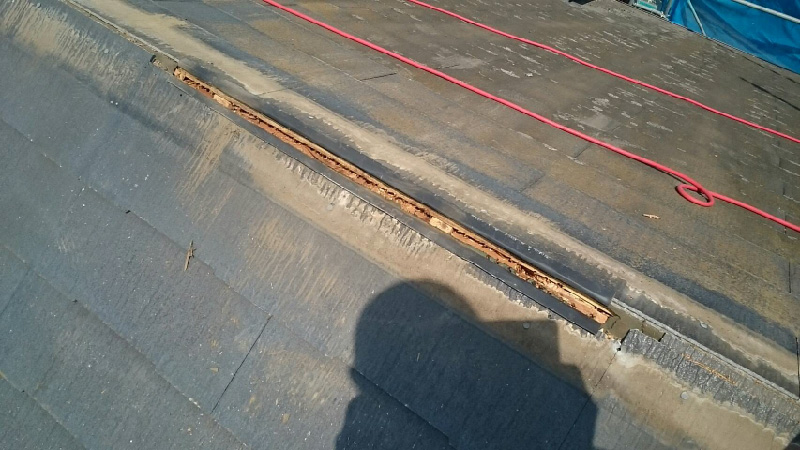
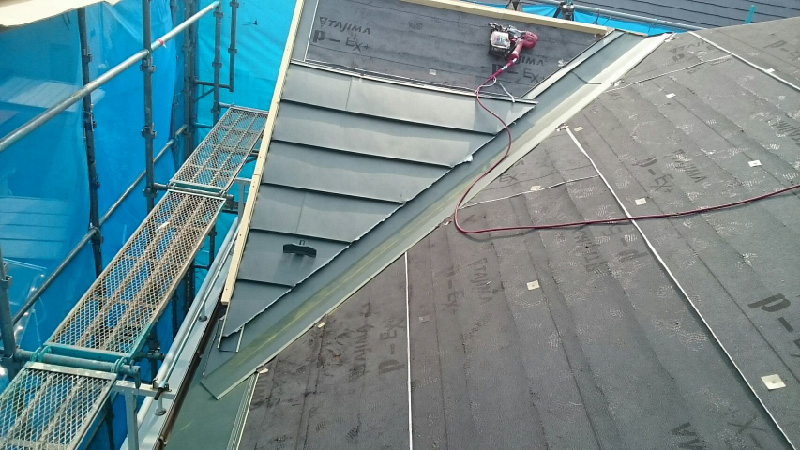
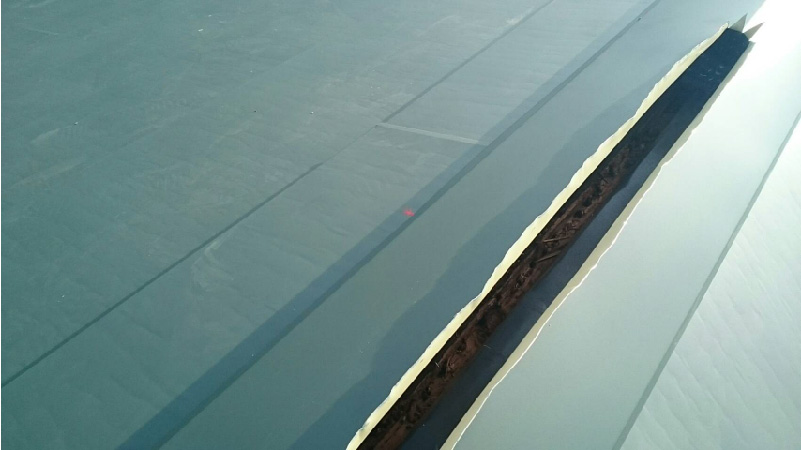
 屋根の谷部分です。谷板金(谷樋)は屋根に降り注いだ雨水が集中する箇所で他の箇所よりも劣化の進行が早い箇所です。一部、錆が発生している箇所があり交換が必要な状態でした。谷樋もガルバリリウム鋼板の製品に交換します。
屋根カバー工法リフォームの施工中の様子
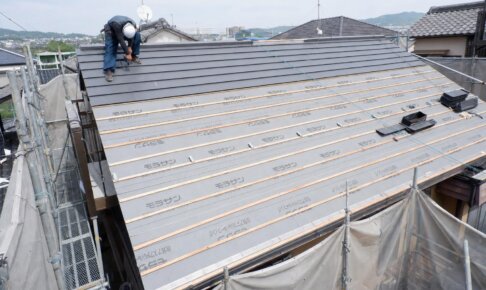
屋根カバー工法リフォームの施工中の様子についてご紹介します。 屋根のカバー工法とは既存の屋根材の上に新しい屋根材を被せる(カバーする)屋根のリフォーム工法です。スレート瓦専用の屋根の葺き替え工法として開発された方法ですが、既存の屋根材を撤去しないために、屋根材の撤去費用と廃棄費用が発生しないために、従来の葺き替え工法と比べて安く新しい屋根材に葺き替えられるリフォーム工法です。 それでは、具体的に屋根のカバー工法リフォームの工程について解説します。棟板金(包み板)の撤去
まず始めに、屋根てっぺんにある棟板金を撤去します。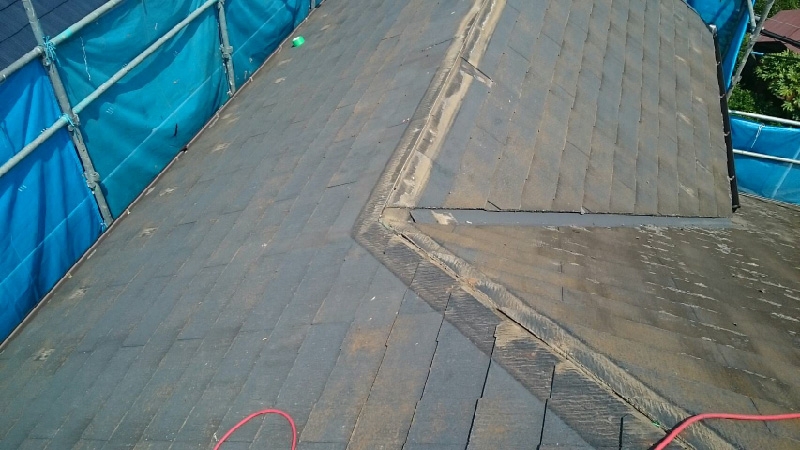 棟板金を撤去した後のスレート屋根の様子です。棟板金を撤去する際に、屋根の雪止めも撤去します。
 棟換気がある屋根ですが、既存の棟換気口のカバーを撤去します。
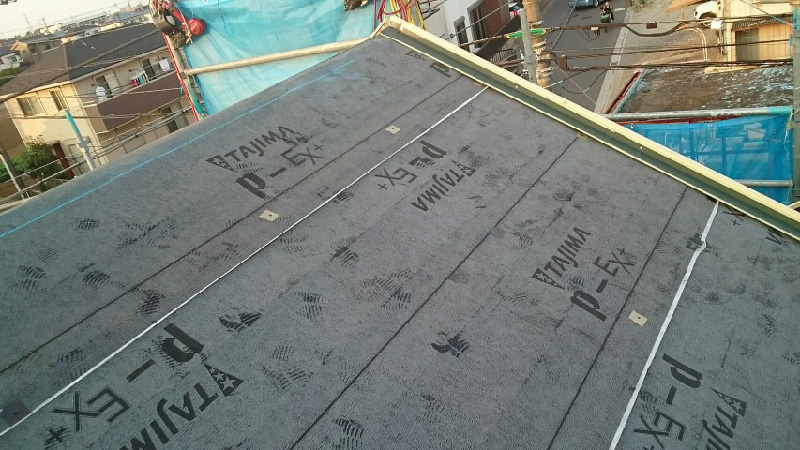
ルーフィング(防水シート)の設置
棟板金を撤去したらルーフィング(防水シート)を設置します。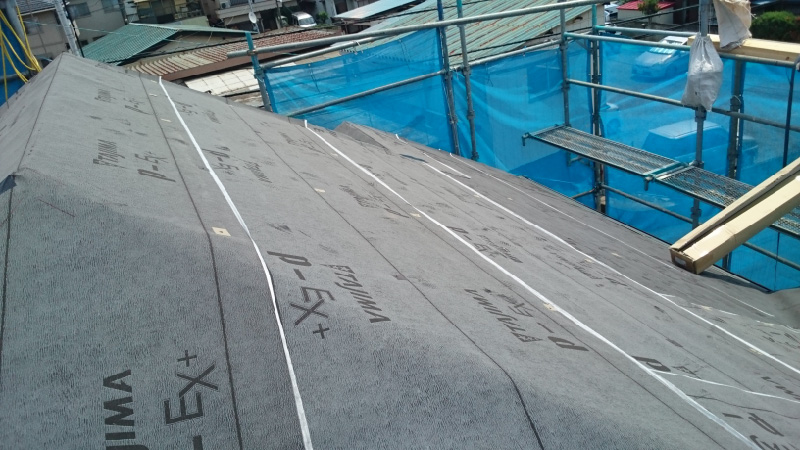 ルーフィングは屋根の二次防水(最終防水)としての役割があり、ルーフィングの設置は非常に重要な工程です。
一般的に、屋根材から雨水が侵入することで雨漏りが発生すると思われていますが、第二の屋根として雨水の侵入を食い止めているのはこのルーフィングです。
ルーフィングは屋根の二次防水(最終防水)としての役割があり、ルーフィングの設置は非常に重要な工程です。
一般的に、屋根材から雨水が侵入することで雨漏りが発生すると思われていますが、第二の屋根として雨水の侵入を食い止めているのはこのルーフィングです。
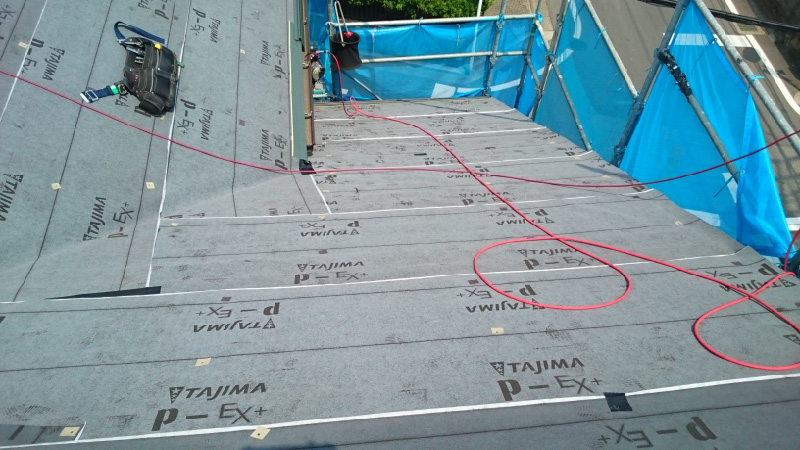 ルーフィングは軒先(下)から上(棟)に向かって設置します。ルーフィングの重なりが1箇所でも逆目になってしまうと、雨水がルーフィングの内部に侵入して雨漏りのリスクが大幅に上がるので、軒先から棟に向かって丁寧に施工していきます。
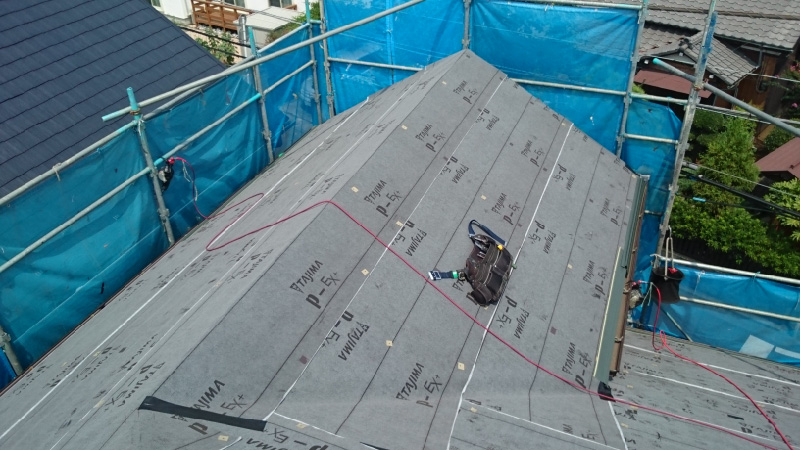 屋根全体にルーフィングを設置できました。
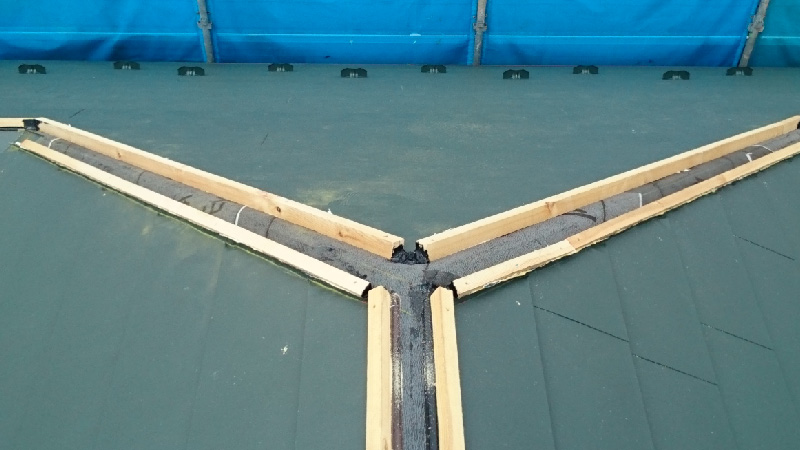
谷板金・役物の設置
ルーフィングを設置したら、谷板金や唐草(からくさ)などの役物を設置します。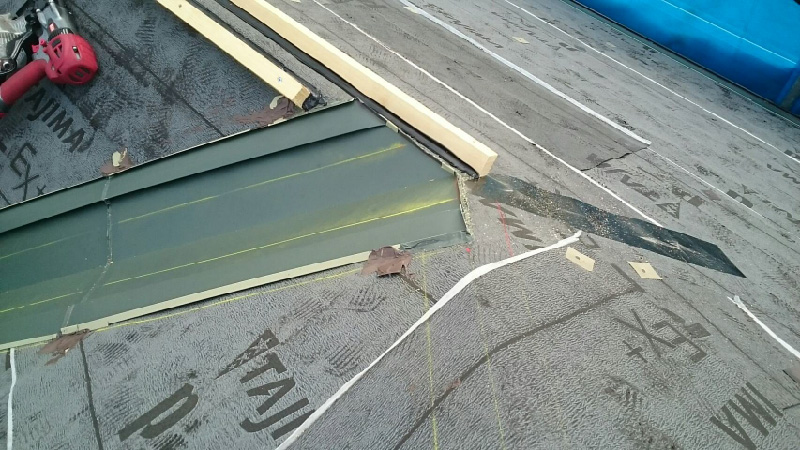 谷樋(谷板金)を設置します。現在の谷樋は耐久性能に優れたガルバリウム鋼板が主流です。
 谷樋を設置したら、ケラバ水切りを設置します。ケラバ水切りとは雨水が住宅の内部に侵入しないようする雨仕舞いです。まずは、土台水切りを設置すための下地を取り付けます。
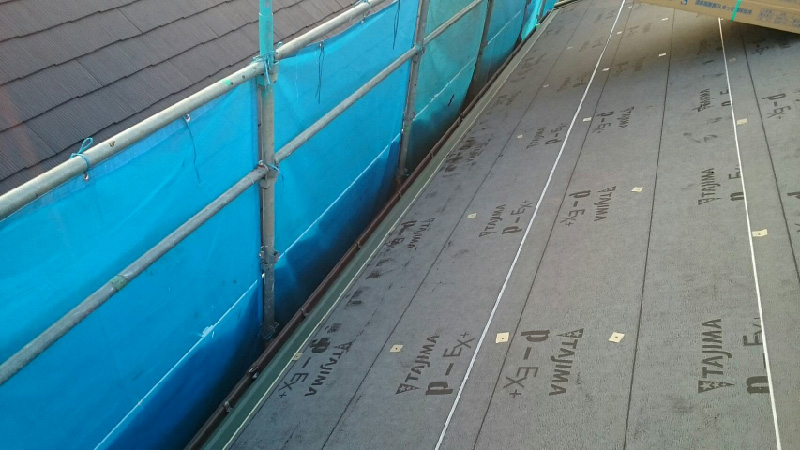 軒先の唐草(からくさ)を設置します。唐草とは軒先の水切りで雨仕舞いに必要な部品です。
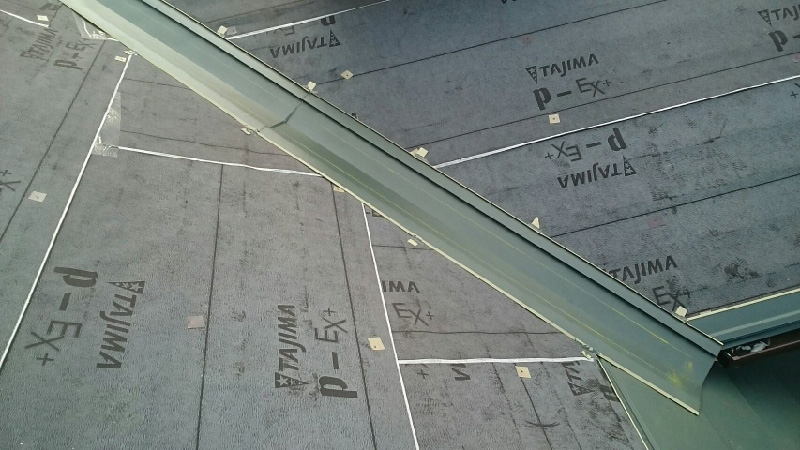 谷樋もしっかりと固定します。
 ケラバ水切りの下地(角材)を設置しました。
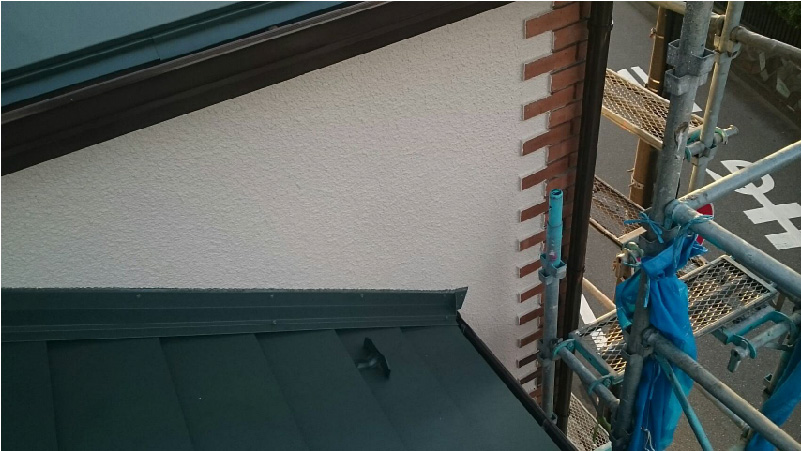
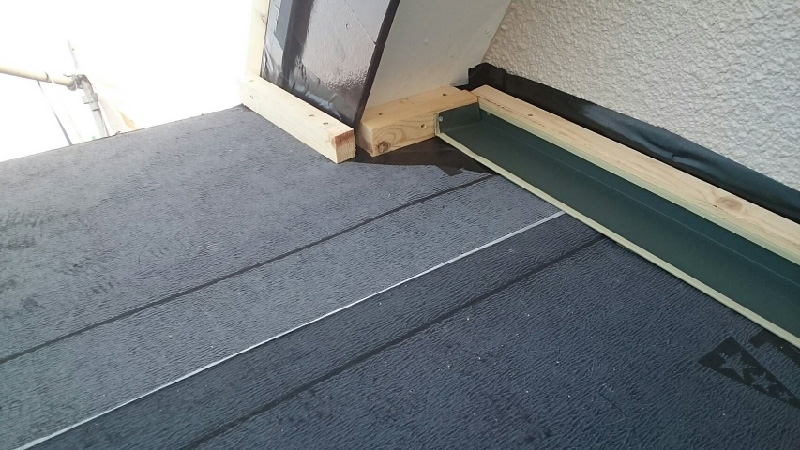 屋根と外壁の取り合い部分の雨仕舞いです。雨漏りの原因になりやすい箇所のなので丁寧に施工しました。
ガルバリウム鋼板の設置
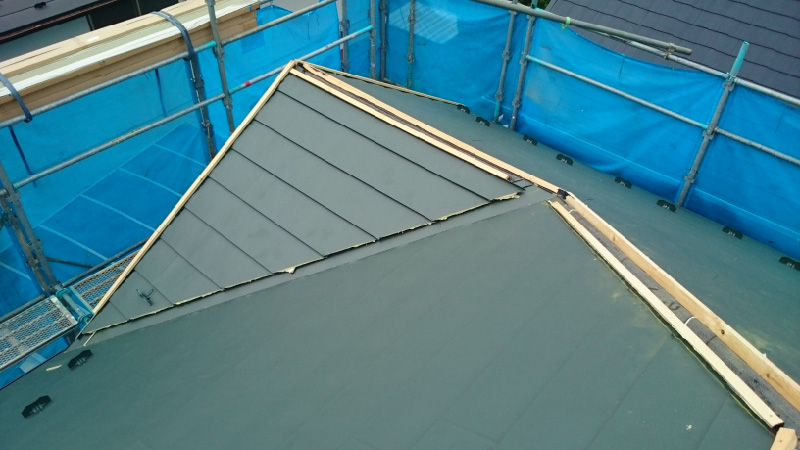
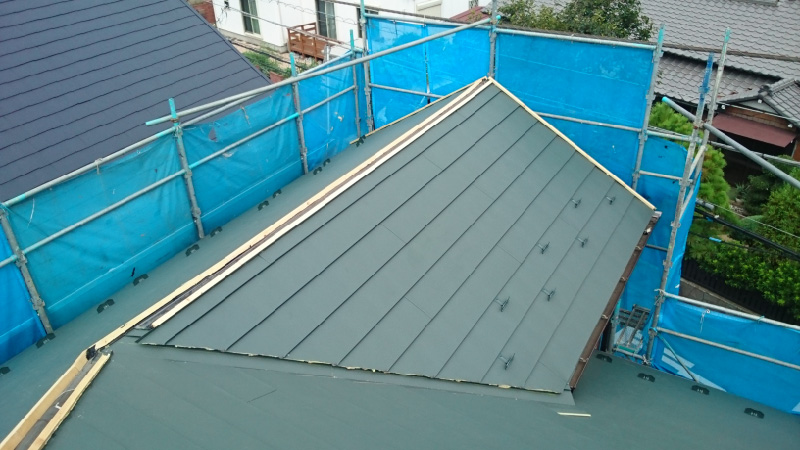
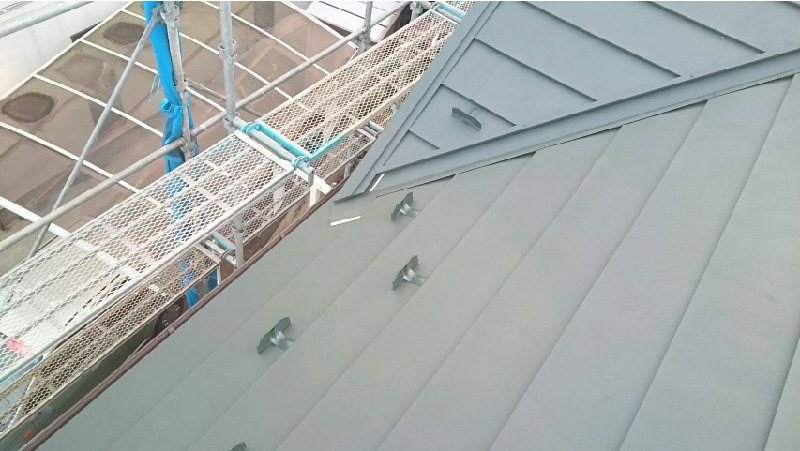
ルーフィングを設置したら次に屋根材を設置します。ガルバリウム鋼板を使用しました。 ガルバリウム鋼板もルーフィングの同様に上から下に流れる水の流れに逆らわないように、軒先(下)から棟(上)に向かって設置します。
 ドーマーの箇所は雨漏りが発生しやすい箇所になるために、丁寧に施工しました。
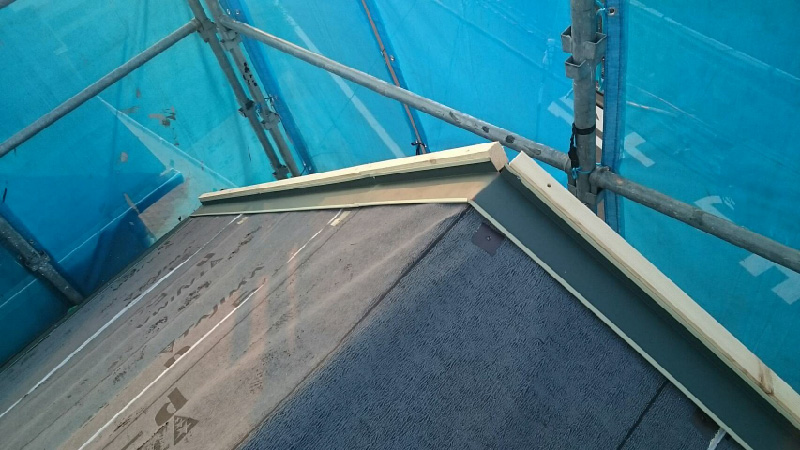
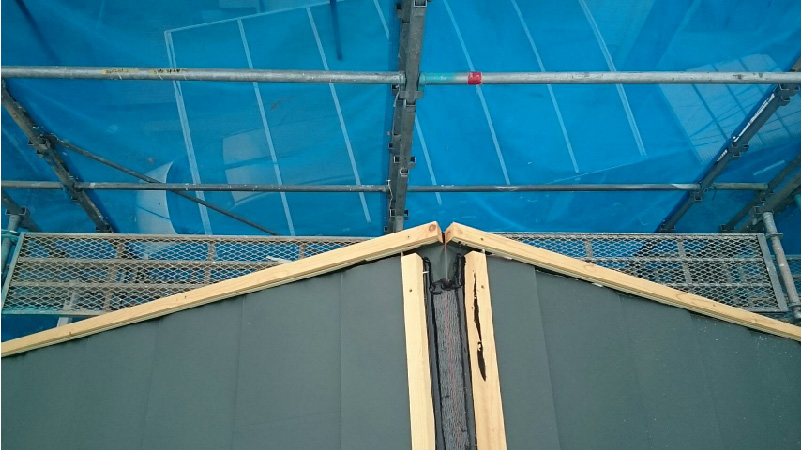
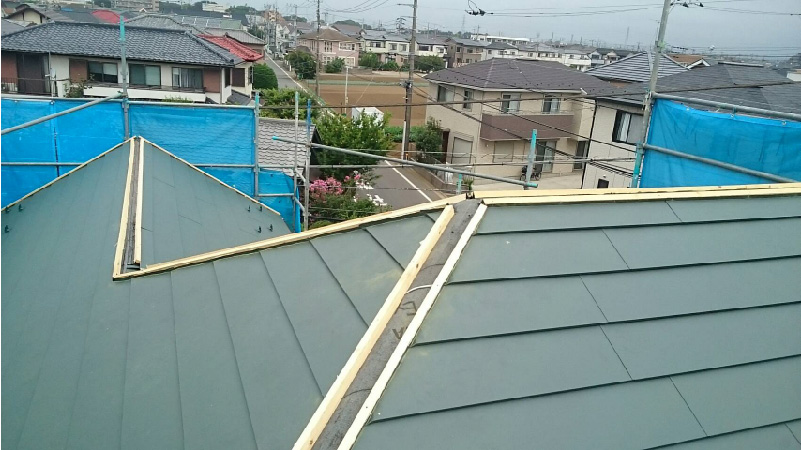
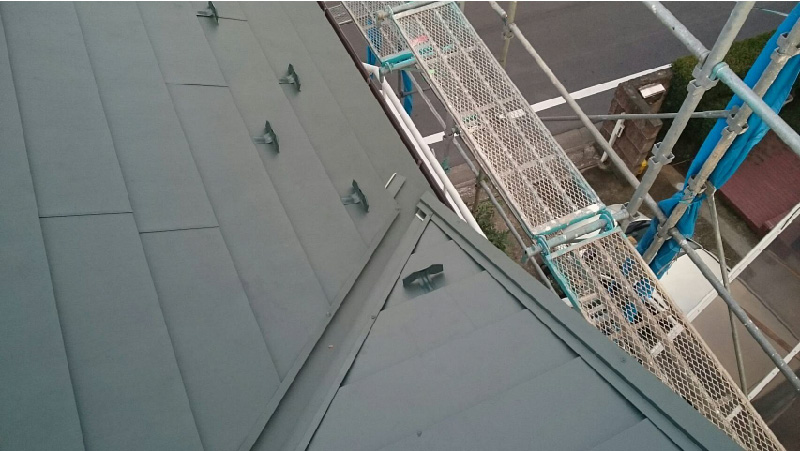
 屋根全体にガルバリウム鋼板を設置したら、棟板金を取り付ける下地を設置します。貫板と呼ばれる角材を取り付けています。
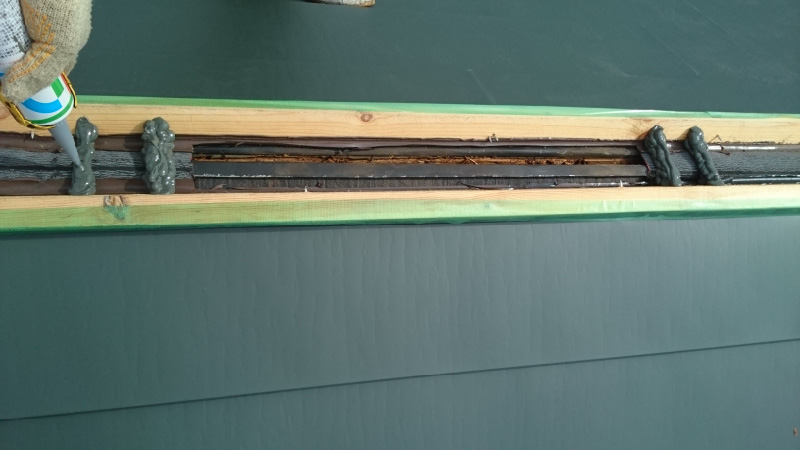 棟換気の換気口もコーキングで補修します。
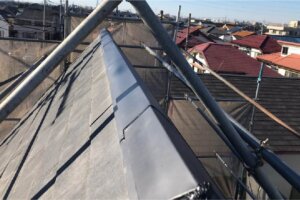
棟板金の設置
ガルバリウム鋼板を設置して棟板金を設置たら屋根カバー工法の作業完了です。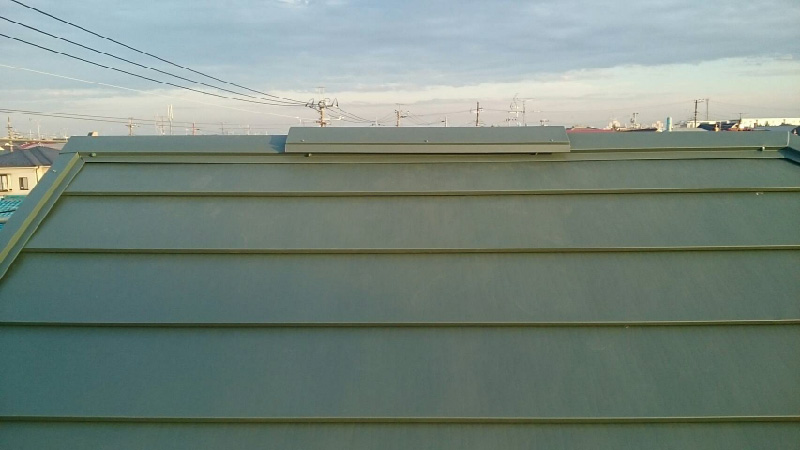 棟換気のカバーを取り付けました。
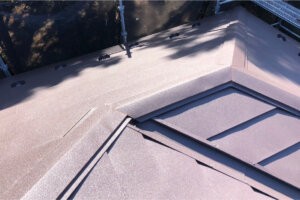
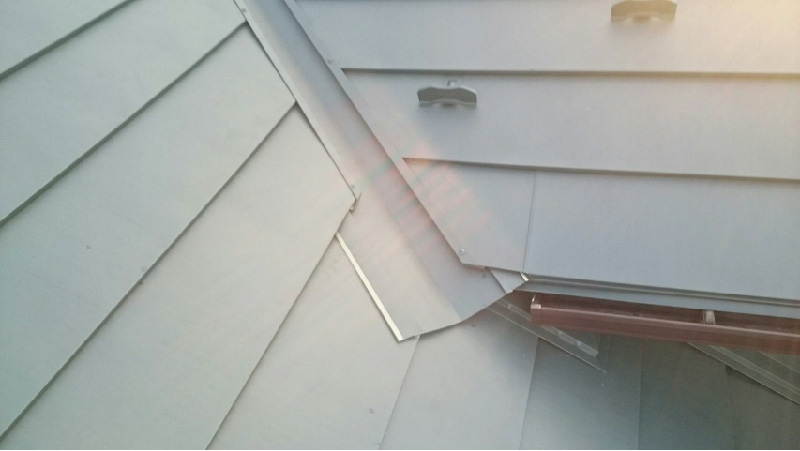 谷樋の納まりです。屋根材の切り口が剥き出しでしたがカバーを取り付けました。
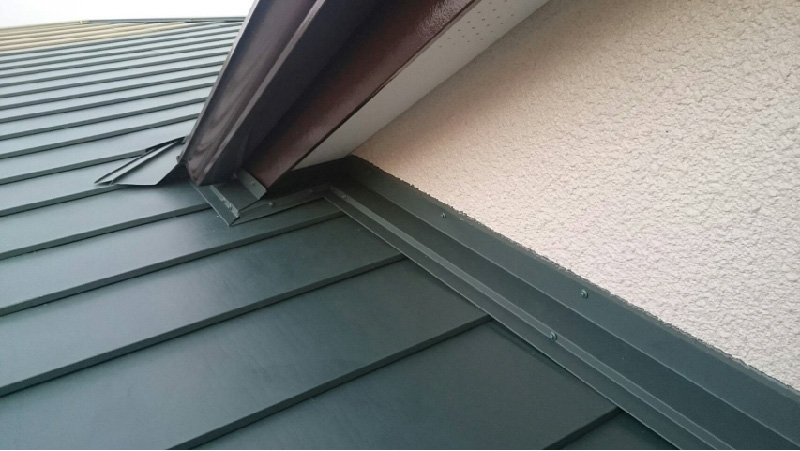
 屋根と外壁の取り合い部分です。雨押えを設置して雨仕舞いは完了です。
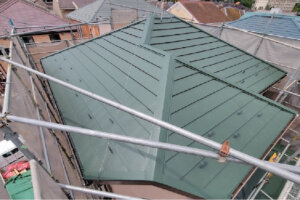
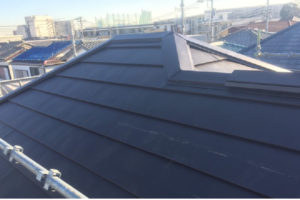
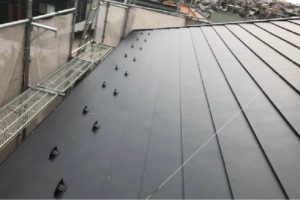
屋根カバー工法リフォームの施工後の様子
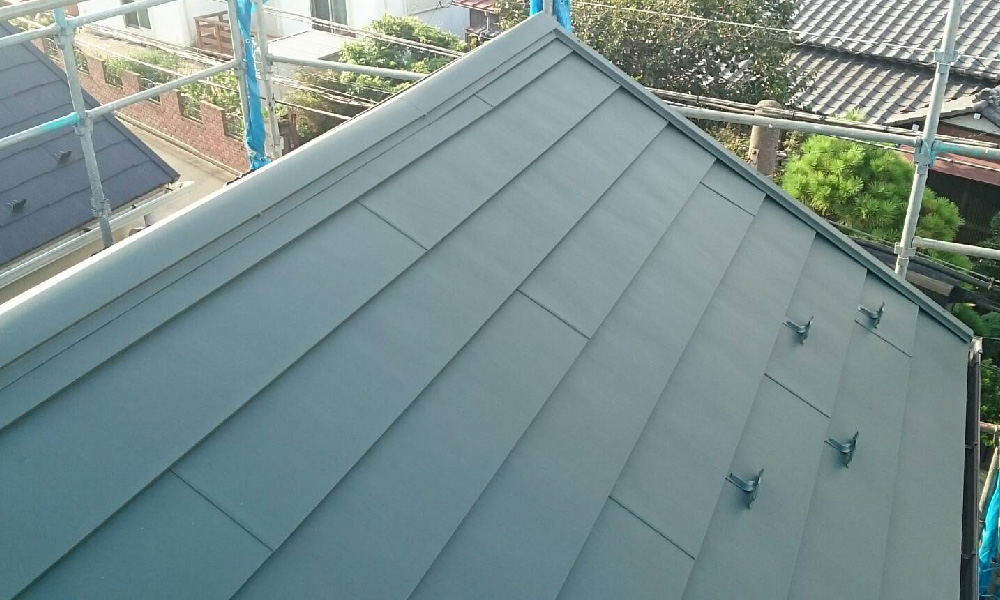
屋根カバー工法リフォームの施工後の様子です。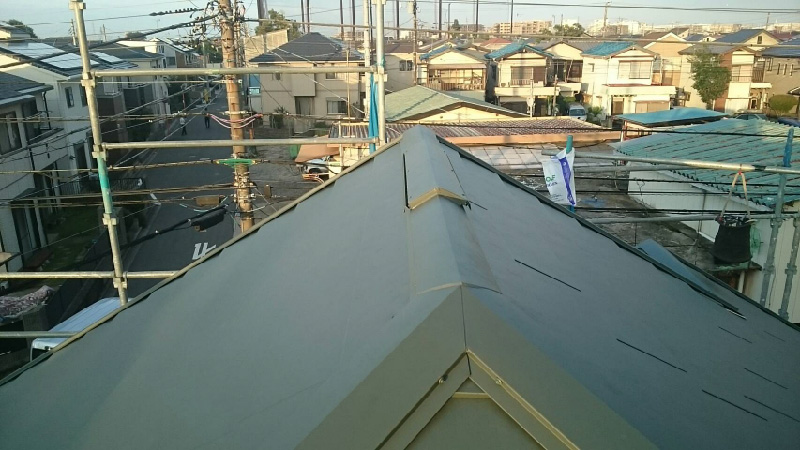 棟と棟換気の棟板金カバーの様子です。ところどころ錆が発生していた棟板金ですが、新品のように生まれ変わりました、
 施工後の谷樋の様子です。施工前は経年劣化で穴が開きそうな状況でしたが、ガルバリウム鋼板に交換することで今後30年は錆の心配もなく安心です。
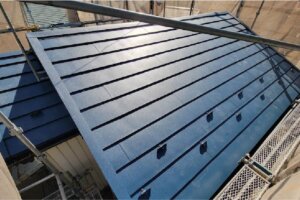
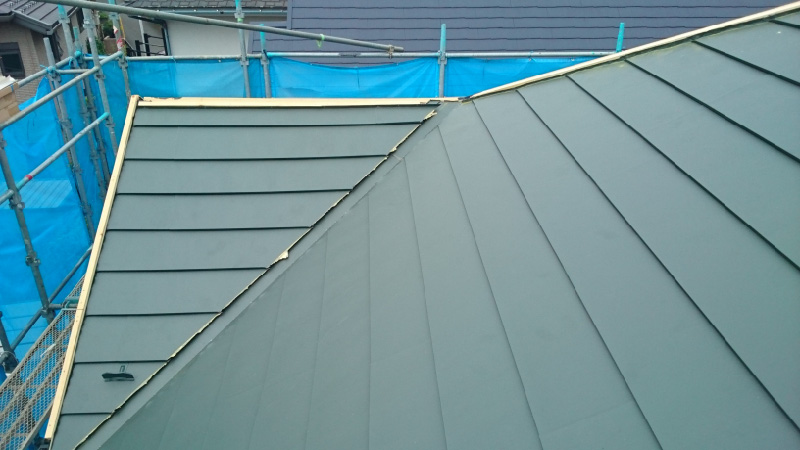
 屋根材の様子です。施工前はカビとコケが発生しており、屋根材が劣化している状態でしたが、ガルバリウム鋼板に葺き替えることでメンテナンスの手間から解放されます。
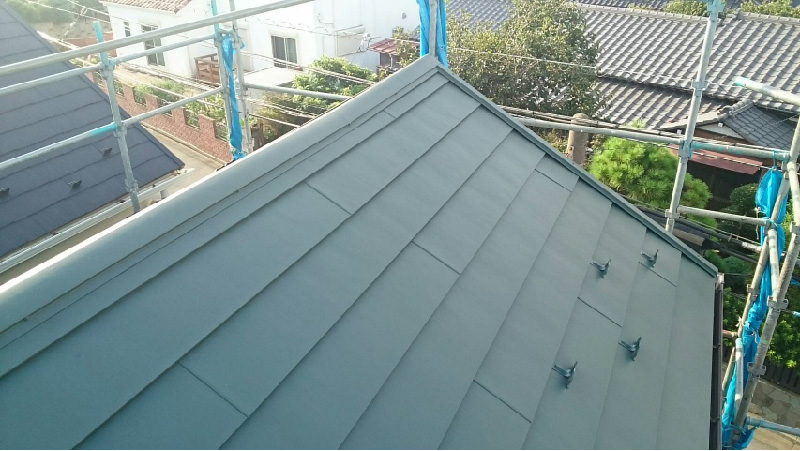
 雪止めも設置しました。落雪により怪我をする可能性を低減し、雪が降っても安全性を確保できます。
 屋根と外壁の取り合い部分です。雨漏りが発生しやすい箇所のなので、慎重に雨仕舞いを行いました。
簡 単 無 料 お 見 積 り
×